Details
When I consult with people that are considering refacing, they’ll often tell me, “The layout is generally fine, but we would like to ____.”
Sometimes it’s converting some lower cabinets to drawers, adding a pullout waste-bin, re-doing the Lazy Susan or adding a cabinet in place of the little writing desk, etc.
Most of these things can be done without too much difficulty, giving an end-result that not only looks like a brand new kitchen, it works better with more storage and better access.

Converting Lower Cabinets to Drawers
This is probably the most-requested change, and with good reason. It increase the useful storage area, makes accessibility much easier and it looks really good.

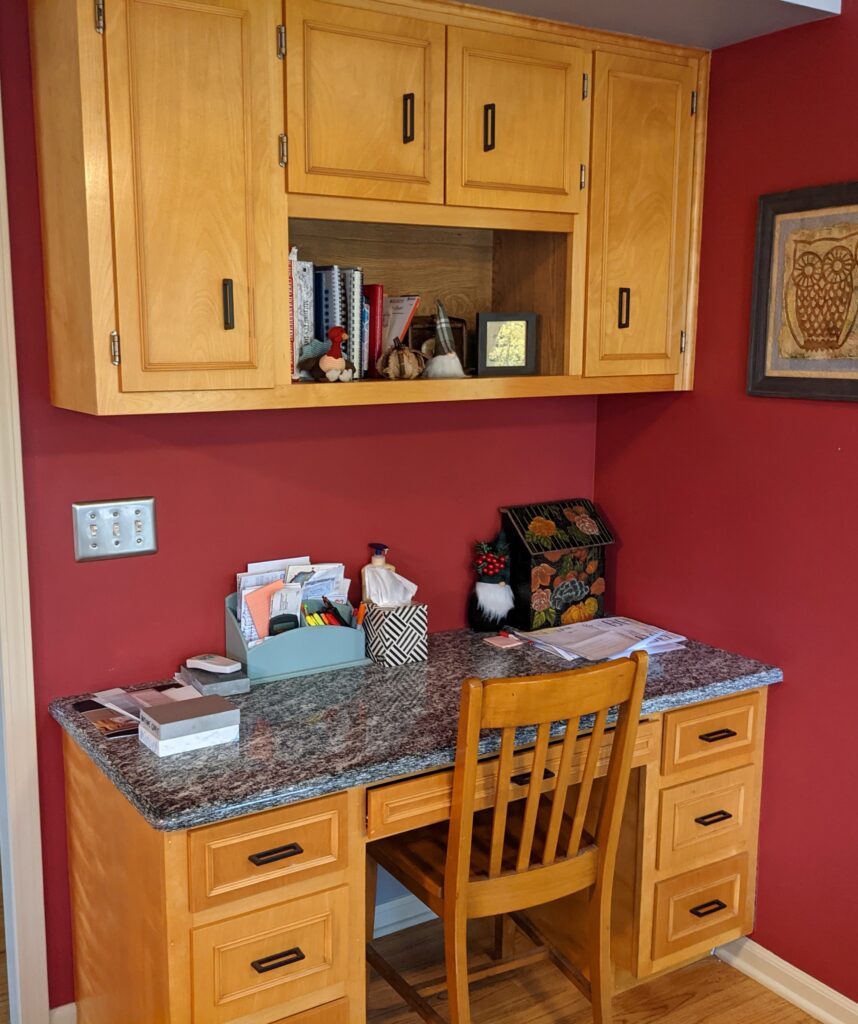
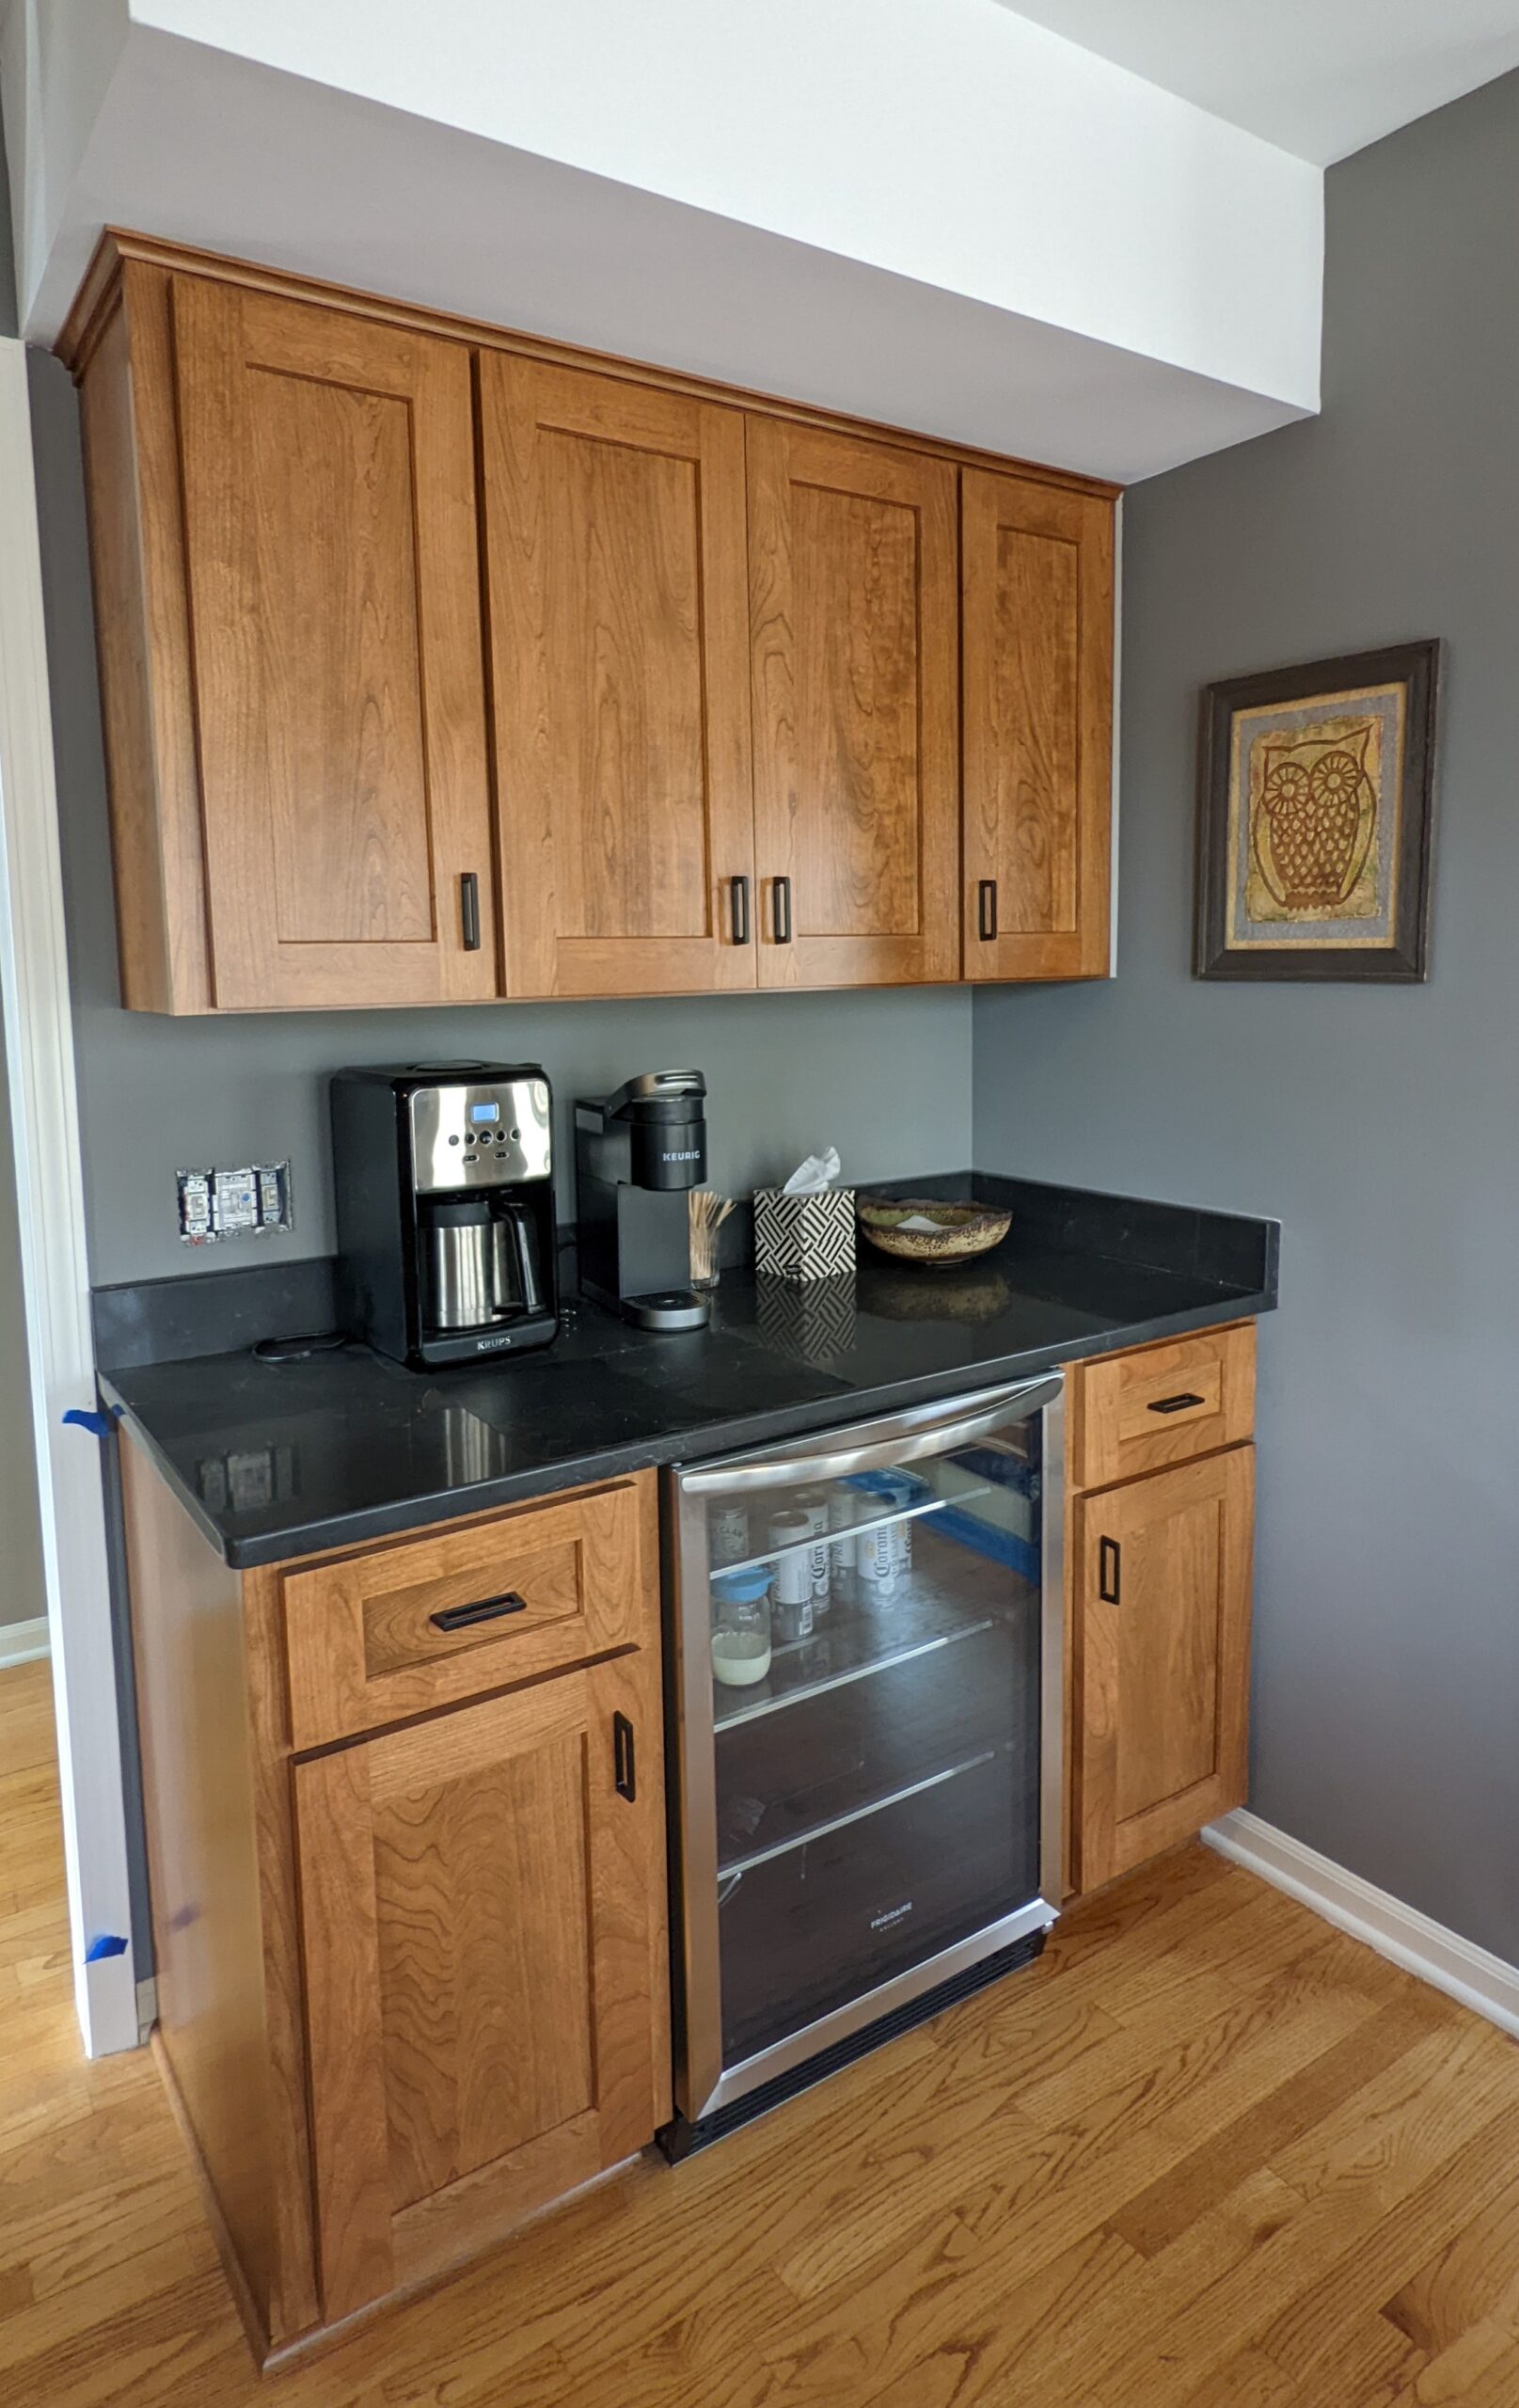
The Little Desk
It was standard issue in many kitchens built in the 90’s. Some people use it as it was intended, but for others it just serves as a place to drop keys, phone and mail while taking up valuable kitchen real-estate.
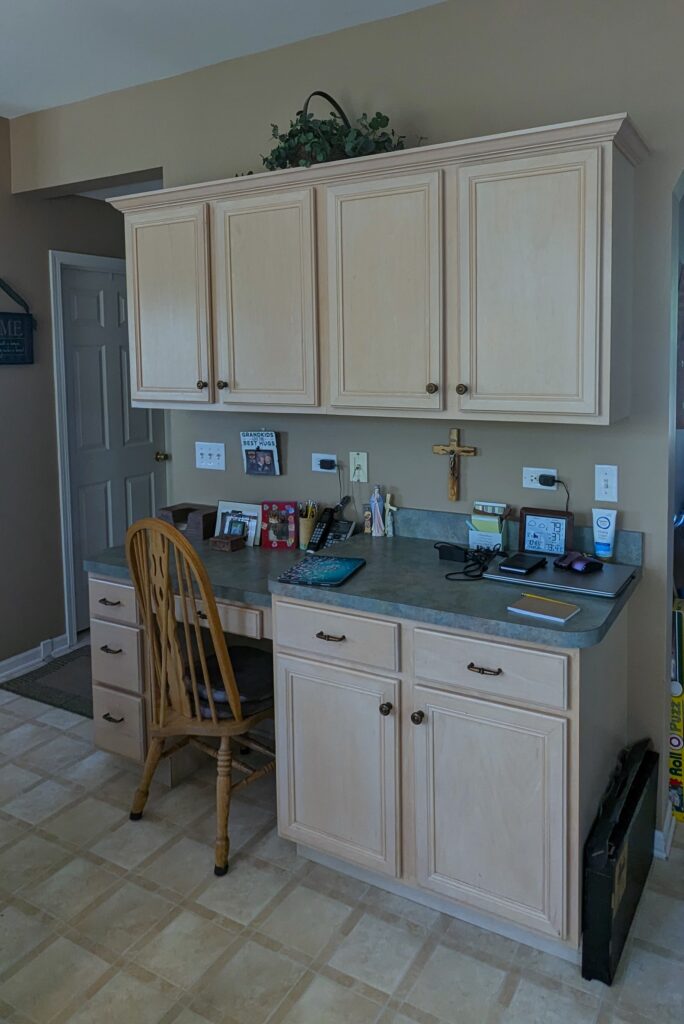
In this case, the clients knew that they wanted to change out the countertops. I removed the desk and installed a new base unit next to the existing one. I converted the base unit on the right to 3 full-width drawers and matched it with the new base on the left. The wall cabinet is the same, just refaced. (Spaces between cabinet doors reduced)

Another approach to the little desk – the customer gave me the specs for a mini refrigerator they bought and I made 2 standard counter height base cabinets. The wall cabinet stayed, I installed full-length doors to cover the open cubby.
Bringing Cabinets Up to the Ceiling
If you have 30″ wall cabinets, it’s possible to add 12″ cabinets above them before refacing – with a few caveats.
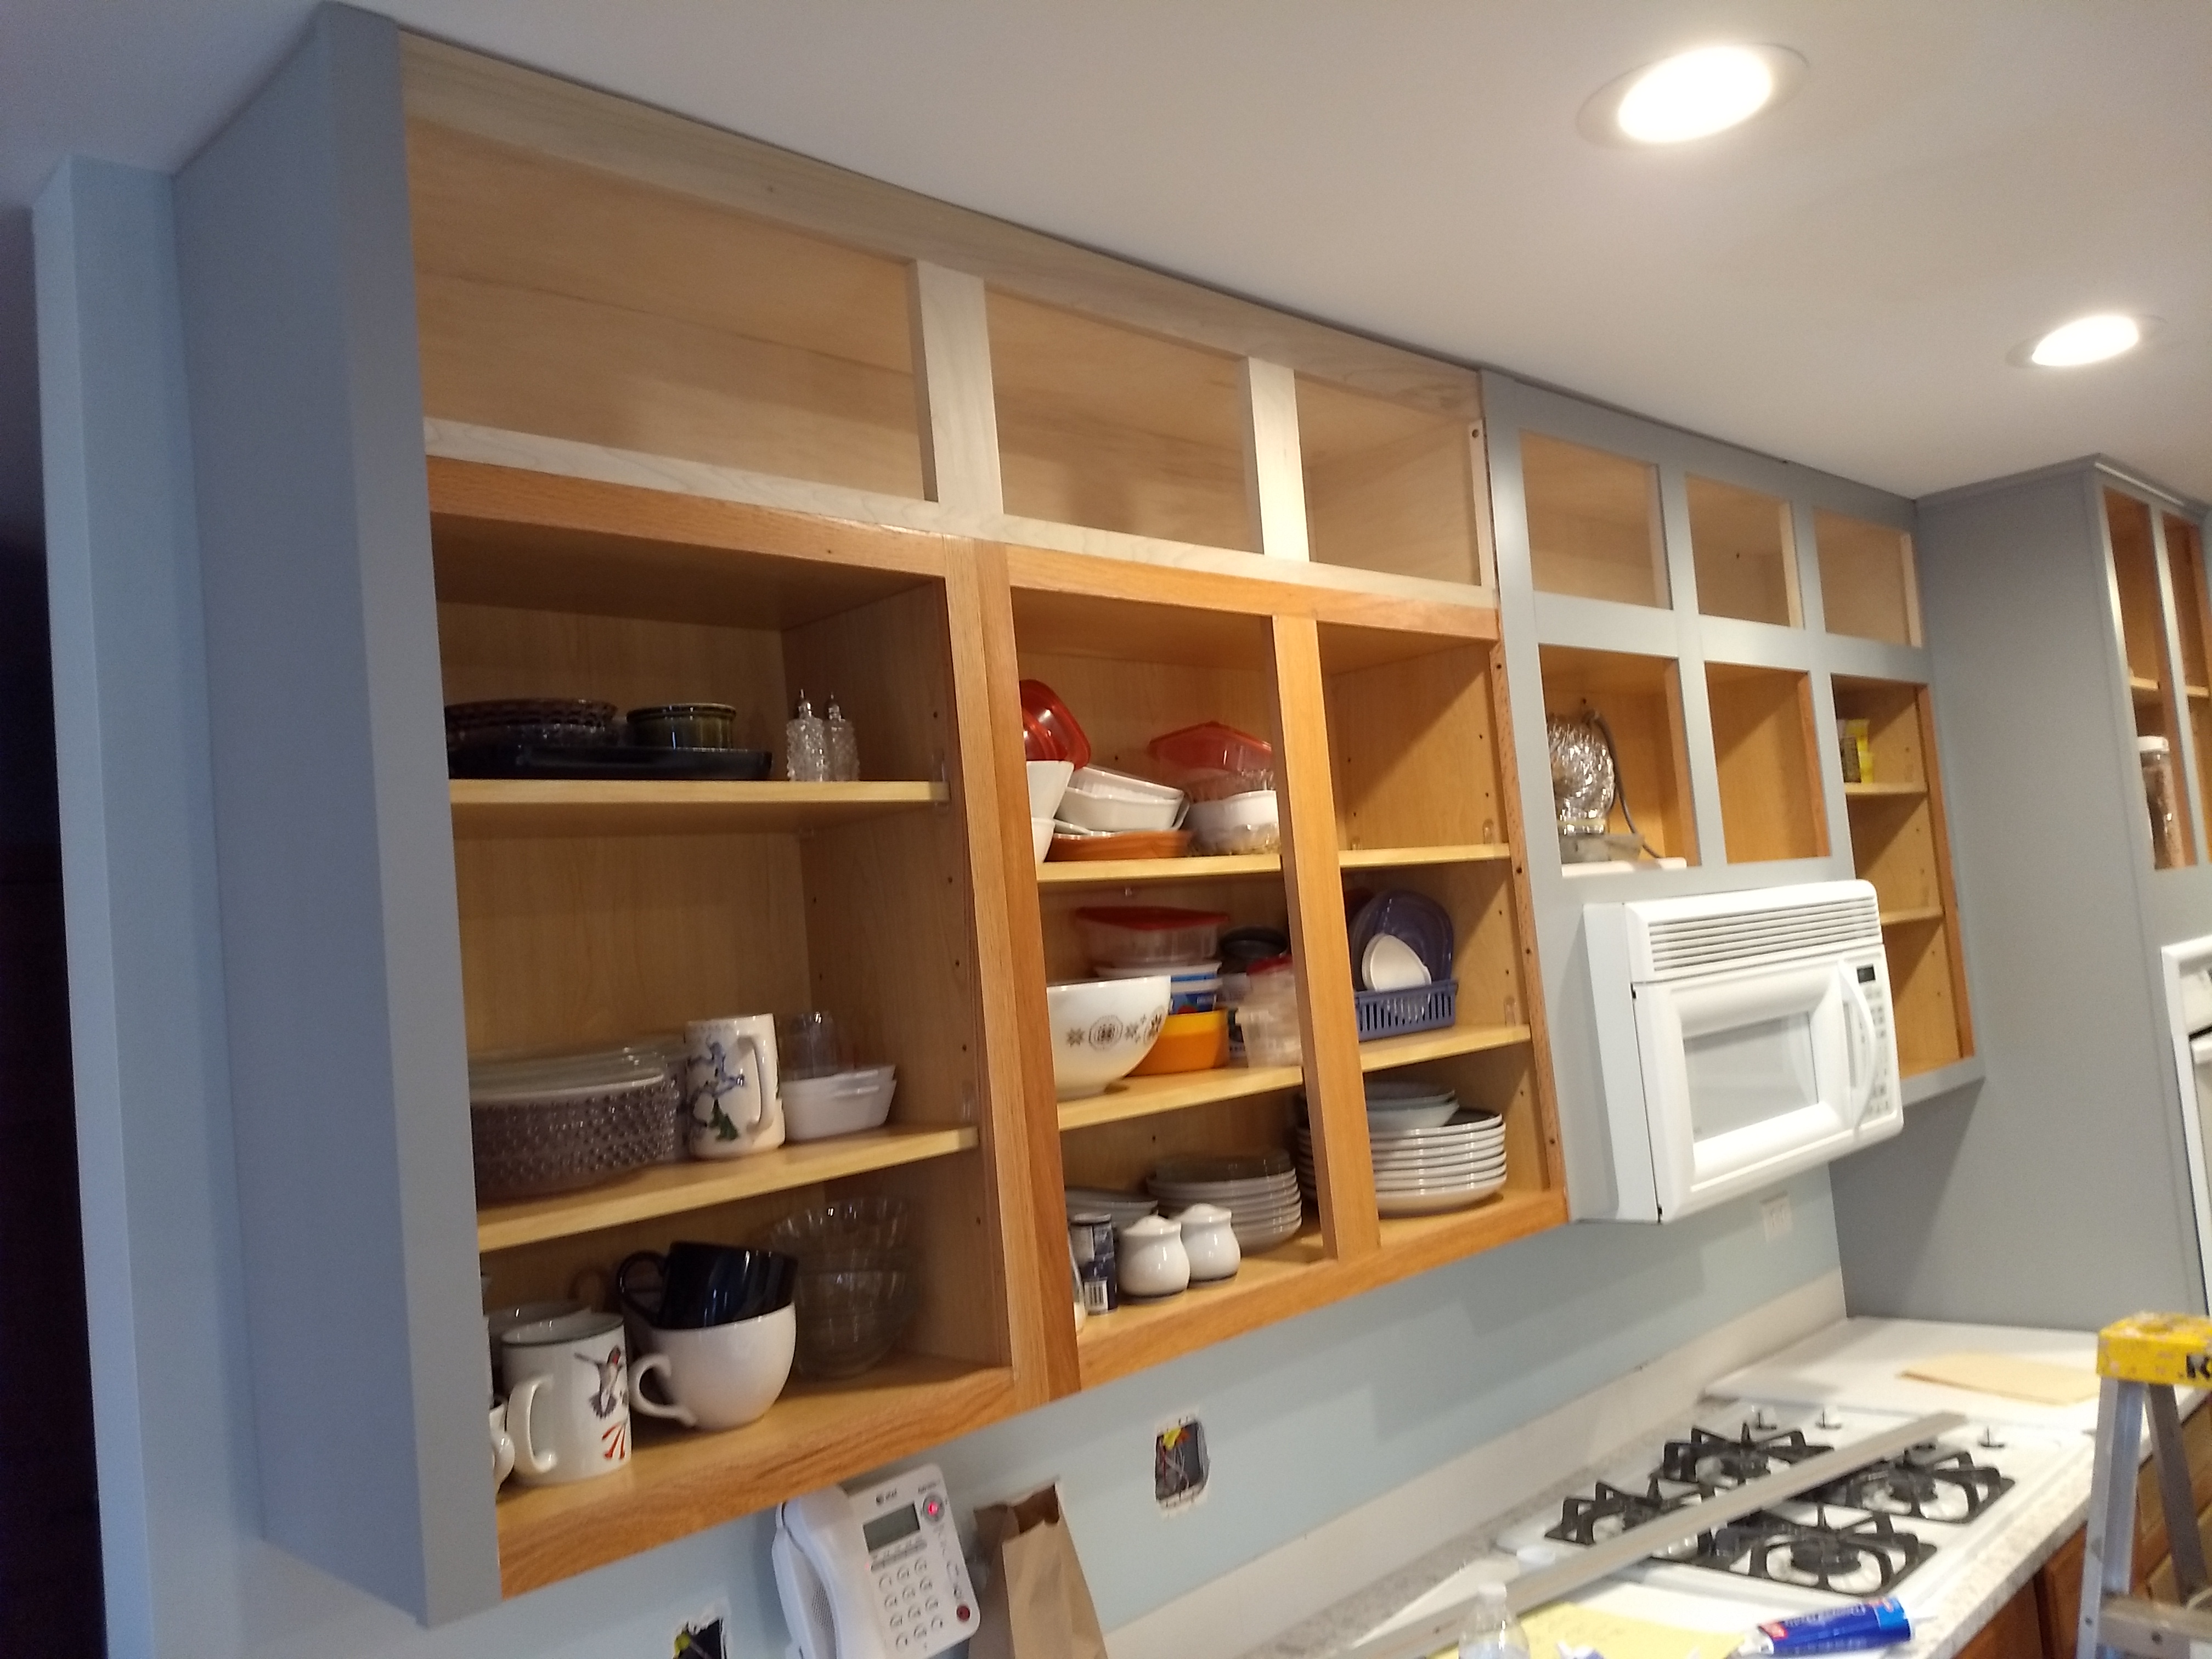
Cabinets going up to the ceiling can be a nice, updated look. But if you have higher ceilings, creating wall cabinets that are taller than 42″ can sometimes look too massive. But with standard 30″ cabinets and ceilings, it can be a good way to get some extra space.
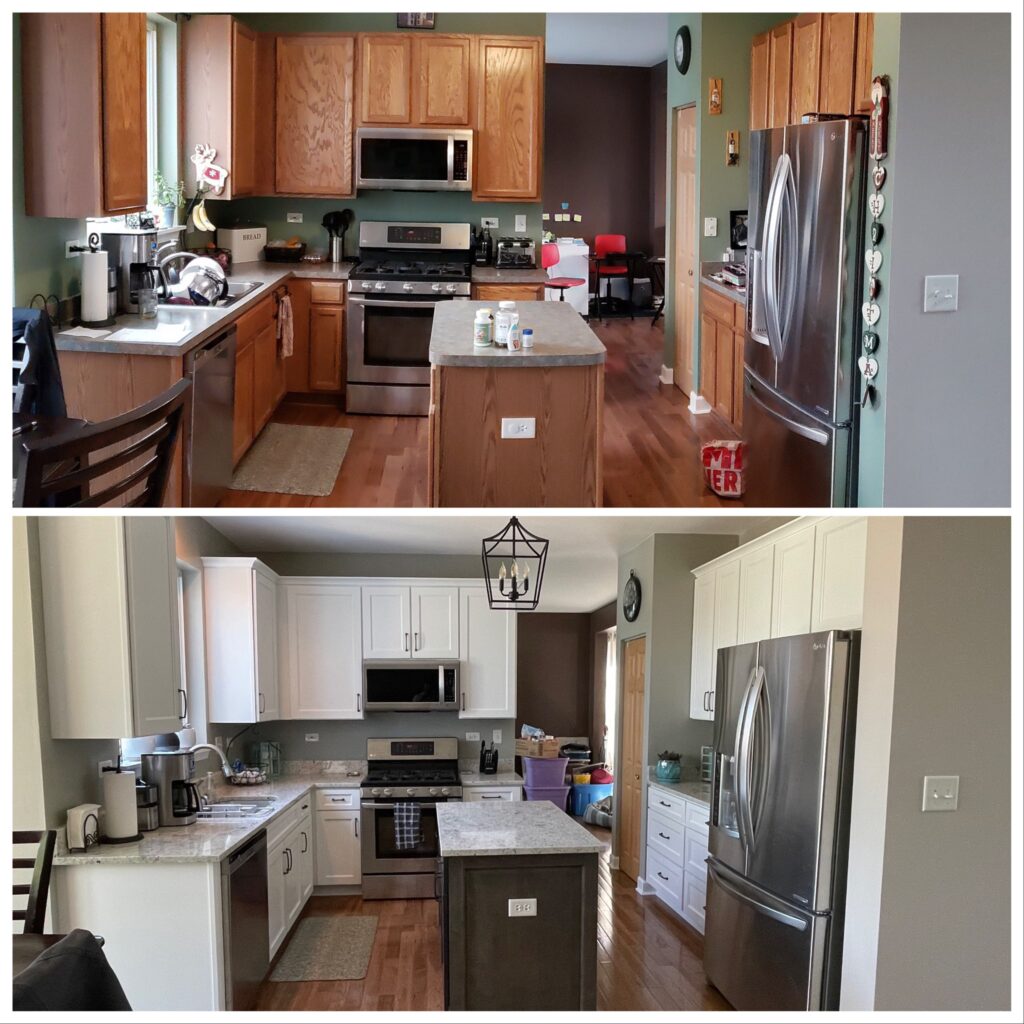
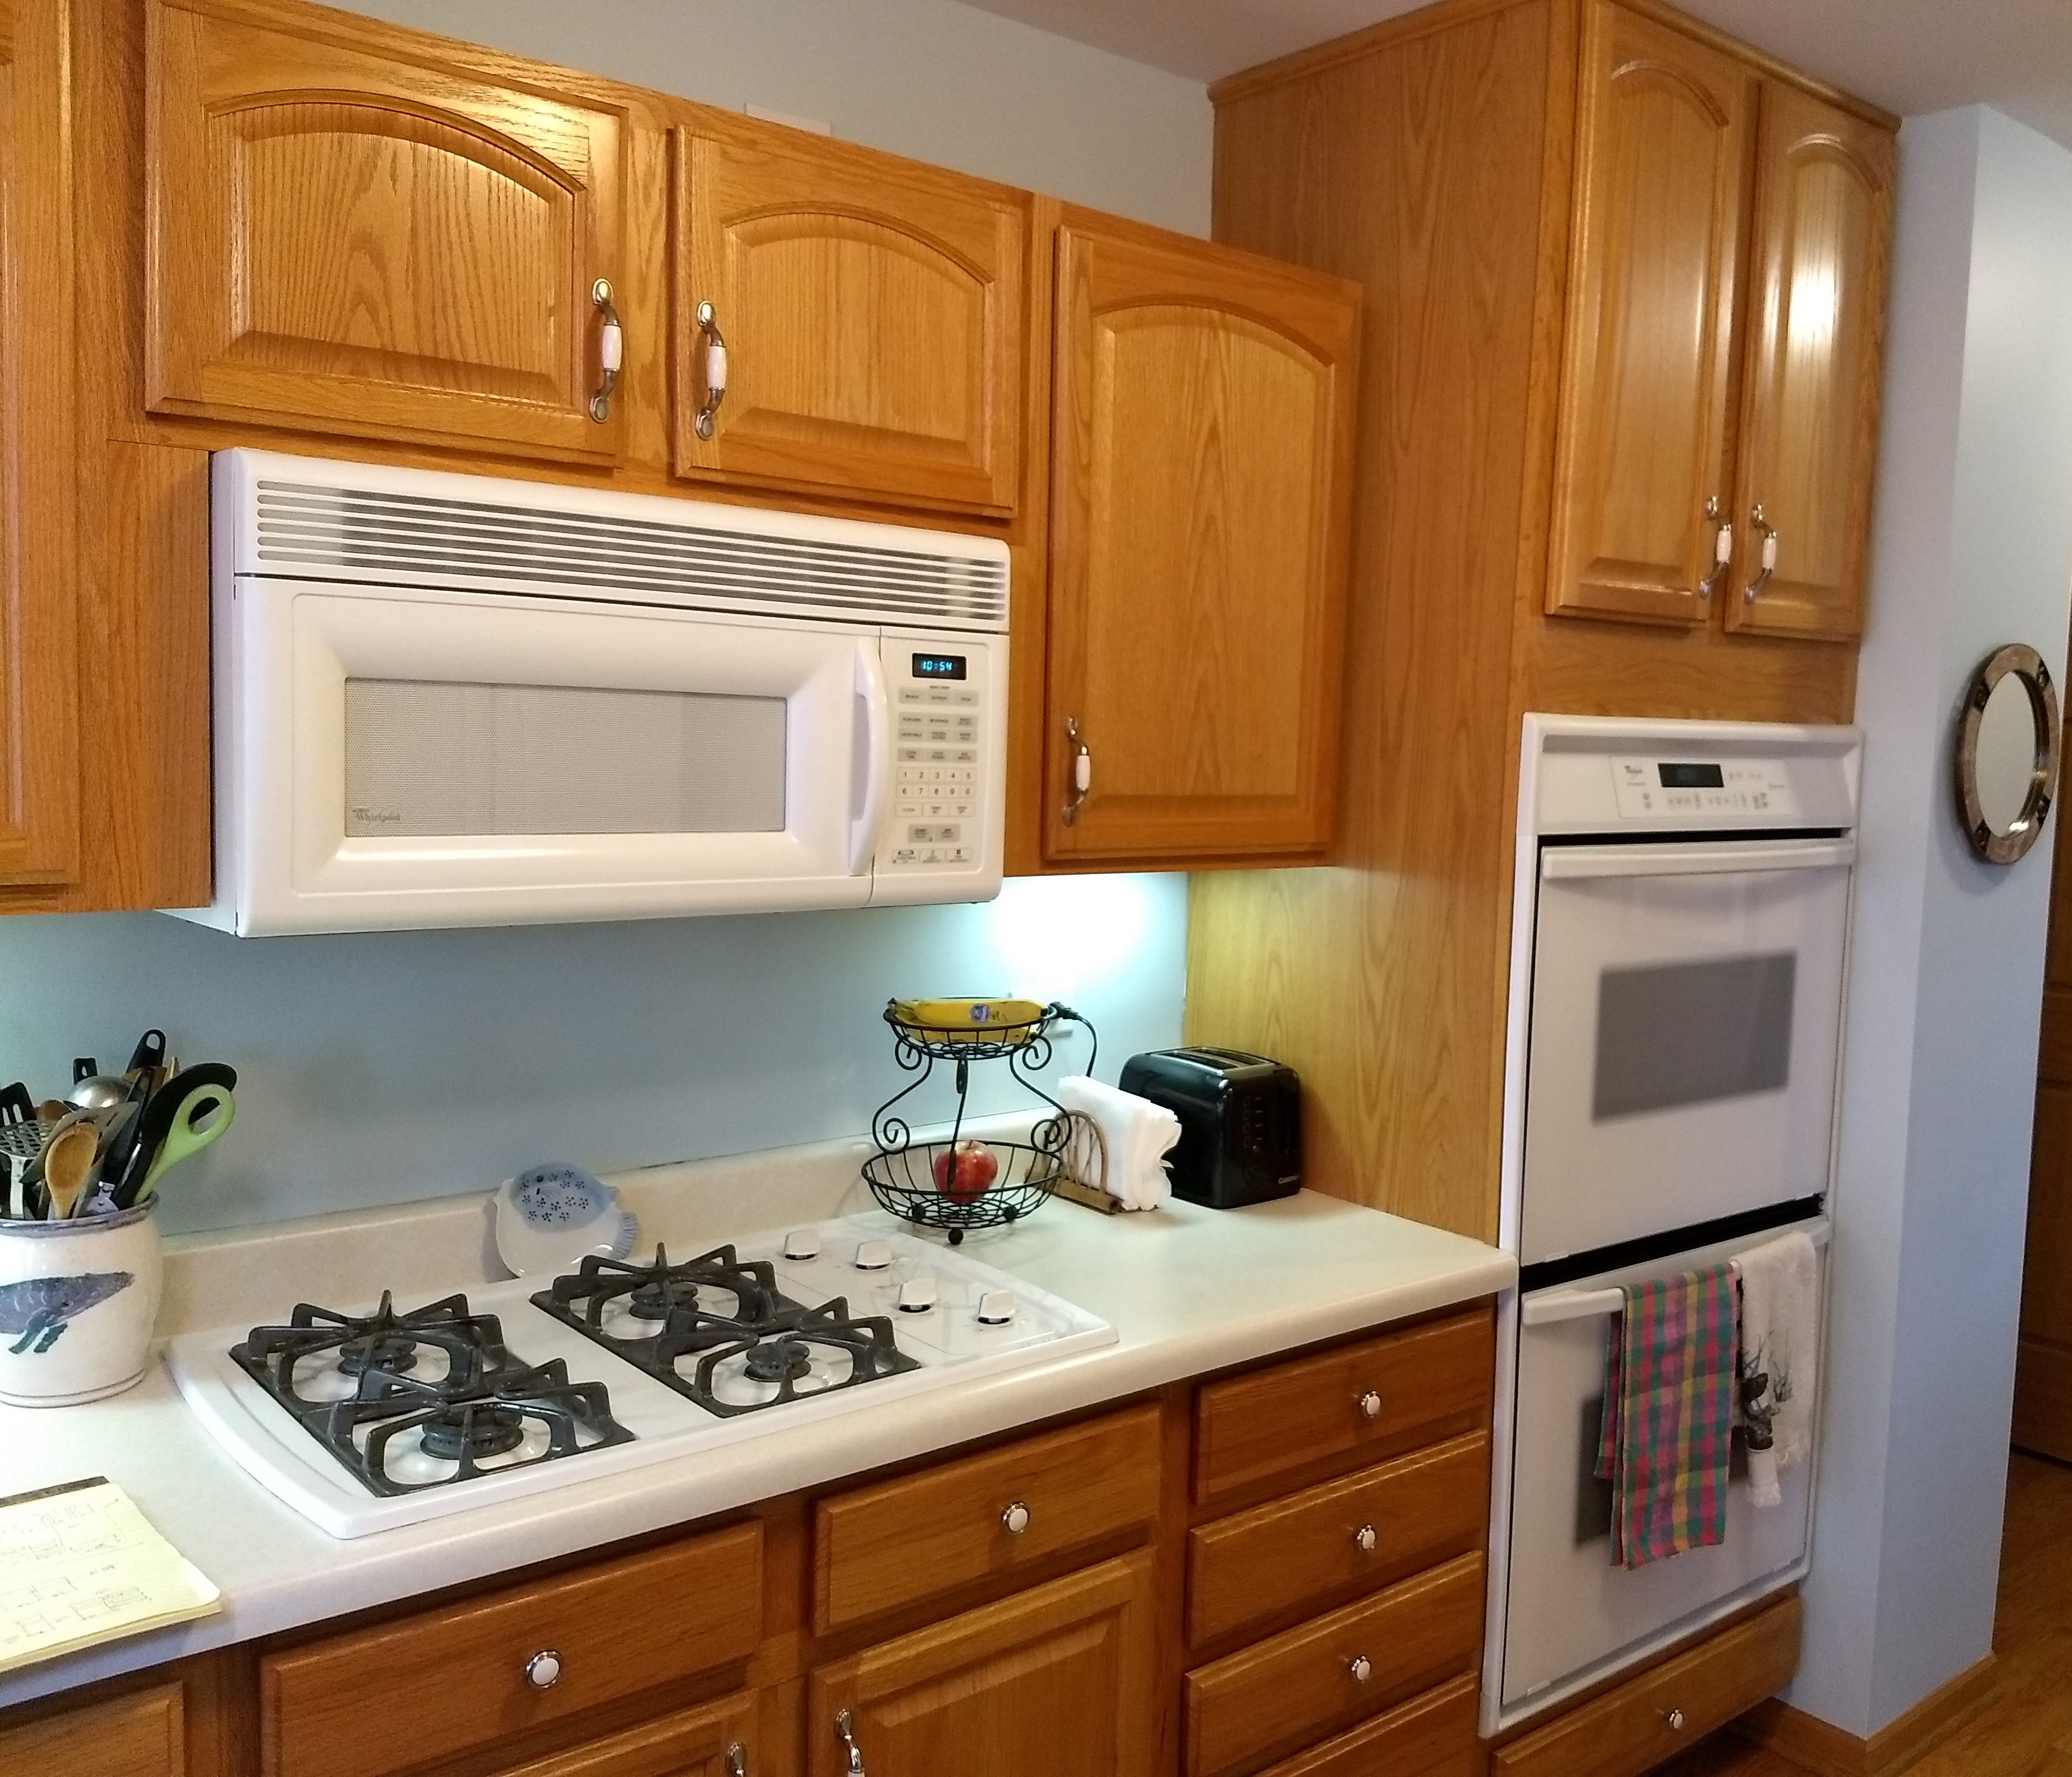
More Than Just a Color Change
Besides the obvious change from the Builder’s Golden Oak cabinets – there are a few subtle, and not-so-subtle changes that helped transform the way this kitchen looks and works.
Door Overlay
Builder’s cabinets typically have large spaces between the doors with a lot of the cabinet frame visible. I usually spec doors that are larger, reducing the space between doors to about 1/2″. A small detail, but it gives the whole kitchen a more custom, upscale feel.
Crown Molding
Although is isn’t essential, depending on the cabinet style. A simple crown profile can enhance the look.
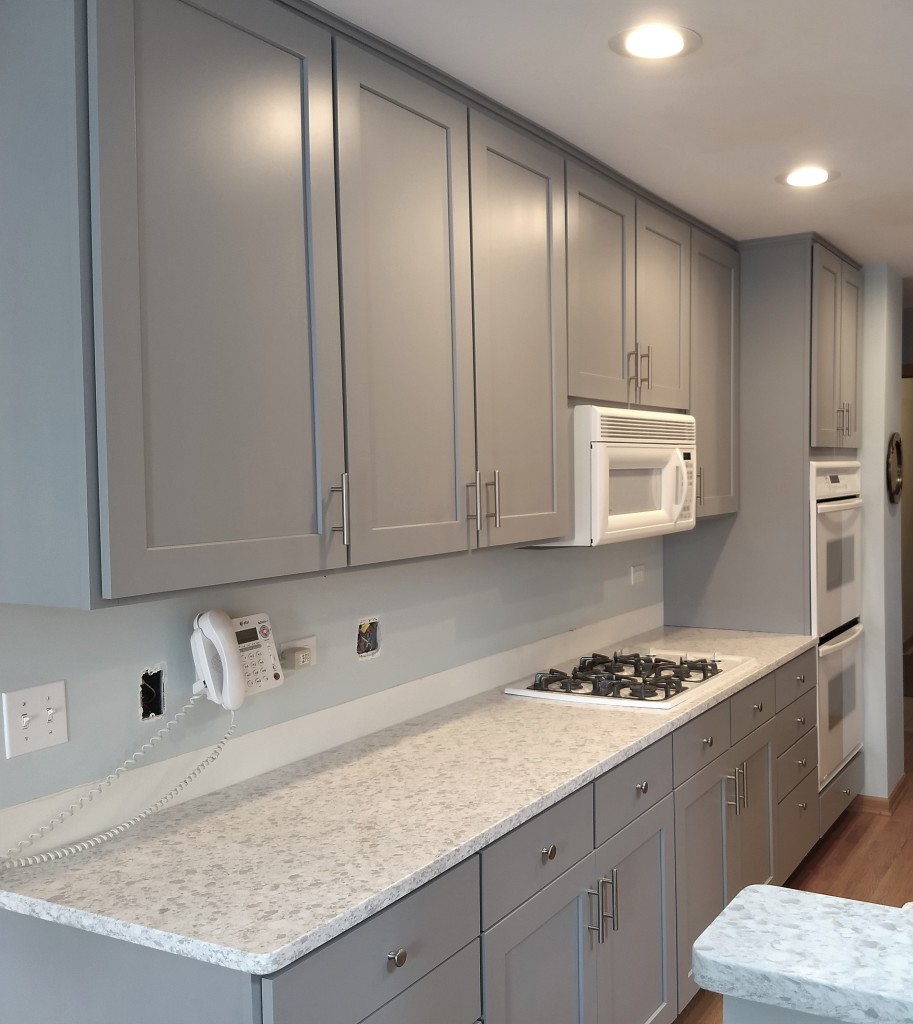
Drawer Conversion
You can see the base cabinet next to the refrigerator has been converted to drawers. Much more accessible storage and it looks great.
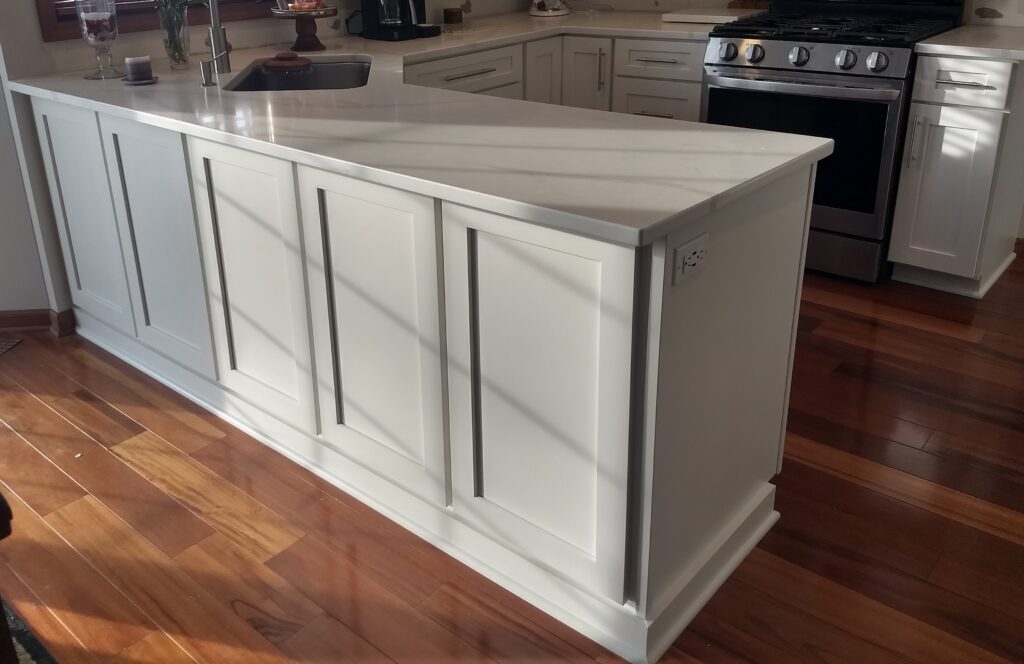
Contrasting Island with Side Panels
The island is in a color called Moonstone and to complete the look of the island being a separate piece of furniture, the back and sides have added panels that complement the style of the doors.